Posts

Showing posts from 2022

Three Anchors

Image
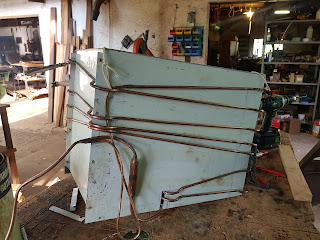
We have put our home for 30 years on the market.  It was a heartbreaking decision.  Our new tiny home is being built and its time to move on. While we wait for a buyer, there are a few more things to do that require our workshop.  The boat is currently sitting on a building frame which needs to be cut off and the metal hull can be touched up and painted.  It needs a total of 9 coats of paint; and it has 3 coats overall so far.  Then there is the finishing top coat (what colour?) and the antifouling paint below the water line. The cradle needs to be made from the cut off metal frame for transporting to the coast.  The choice is Richards Bay or Cape Town. We will need an anchor for the many situations we will encounter; mud, sand, rock, and weed.  We bought a 20kg Vulcan spade anchor, and John has decided to make another two.  One will be a 18kg spade type with a roll bar, and the other will be the old classic Fishermans which will weigh 35kg. ...

Mast Fittings and Rigging

Image
 According to Ropes for Africa where we bought the kevlar rope for the rigging, we may be the only keel sailing boat made in SA using it.  Wire rope is more conventional but kevlar is lighter.  Dyneema would have been the best option but that is not available in SA and expensive.  According to the specifications, kevlar is 5 times stronger than wire rope.  So we worked it splicing the ends to fit around deadeyes and finished with whipping cord.  The deadeyes were also handmade from a variety of woods.  The stainless steel straps also designed cut and polished to a mirror finish. The two booms were made with clear oregan pine.  The stainless steel gooseneck fittings again designed cut welded bent and polished.  We are now onto our third stainless steel supplier, NSS who are offering great service.

The long and the short of it

Image
 The main mast made of sitka spruce required weeks of glueing to get the right length 14m and width and thickness.  It is hollow to reduce weight and tapered.  The final assembly needed many hands on deck to apply glue and maneuver the spagetti-like pieces together, and it all fitted together perfectly.  John has tetris skill. Getting the fittings for the masts is another challenge.  It is probably not a good idea to build a boat in Johannesburg, or South Africa.  Back at the drawing board (we do old school pieces of paper) and see how we can have these fittings fabricated. The main boom is made of white ash.  A constant worry is weight.  Ideally oregon or spruce would be better, but we have ash.  Home built boats are known to be way overweight!  We won't be winning any races. Main mast 14 m Main boom made of white ash

The Two Masts

Image
 The mizzen mast was tackled first, made with clear oregon pine.  As the pieces were rather narrow, there was much jointing and skiving to get the right width and length.  The final assembly used up 98 clamps to make the 10m tapered long box.  Then it gets sanded into shape. The main mast is made with spruce.  The dusty old planks were waiting in storage originally bought for an aircraft, but then given to us.  Perfect wood for a mast.  Main mast 14m. Mizzen construction Mizzen final assembly, 98 clamps Sizing up the spruce Main, glueing up the skive joints

Hold course

Image
 A soul without a goal is like a boat without a rudder. Our rudder which began to take shape in August 2020 is complete and fitted.  Well almost complete.  It just needs a few coats of boat paint and anti-fouling applied and the auto-steering attached. Shaping by hand Ready to add grooves for stainless steel straps Stainless steel hinge in matumi bearing

Handy grips

Image
 After several coats of paint on the cabin top, the grab rails could be installed.  Inside the cabin hand grips were added which served the dual purpose of strengthening the roof.  The retro fit meant the bulkhead had to be cut into, but the resulting curve looks great. The companion way was fitted and the sliding hatch made.  The lazarette top was also made, but the fittings and how it will lock up still to be figured out.  Also need to figure out how a security gate can be fitted to the companion way opening.  It is apparently needed in many towns and cities. Grab handles Grab handles Grab rails on each side of cabin top. Companion way.

Top Notch

Image
 Almost 2 months of work so far on the little dinghy (which we have nicknamed BoatyMcBoatface) and it was cut into the requisite 3 banana-peel-shape pieces.  It was a big moment to see if it fitted into the designated storage space, and it did!  Now to finish off fibreglassing the pieces. How many saws do you need ... Fibreglassing the outside of Boaty Gorgeous cacoon shape Lots of trial and error to work out the perfect strip size Boaty is born Feeling more confident with fibreglassing and the weather being perfect, it was time to do the cabin roof.  John had spent months thinking about how to do it.  So many things could go wrong.  We laid the cloth down and stapled it into position.  John mixed the resin (the most important job apparently) and Maxwell and I spread the resin evenly over the cloth with scrapers and a brush.  It was a perfect job, even if I say so myself. Big job done.  Still have to do the edging and several coats of paint i...

Fit for purpose saloon table

Image
 Having made hundreds of tables as a furniture maker, the rosewood saloon table is probably the cutest.  Designed to fit the small space with drop-leaf sides.  Even the top is made up of lids which open up to reveal some storage space underneath.  And a cutlery holder. Because the weather is still not right to tackle the big job of the cabin roof fibre-glassing and painting (its too hot!) the dinghy will begin construction. Being old school, the design of the dinghy is adapted from an old woodbending book describing a design for a viking boat.  Okay, same principles.  The dinghy will be 9 feet long, and come apart in three long banana shapes, for storage.  The plan is it is going to be good for rowing, maybe sailing, and hopefully have an outboard engine too.  Nothing like a good design and construction challenge!

Happy New 2022

Image
 Working on the boat took a back seat late last year due to the Barn project, which in turn takes a back seat as we review our property conundrum.  Keep calm, as the saying goes.  And keep busy with some cabinetry work. There is a small space in front of the fridge which can store a spice rack, so off to find the spice bottles and make the rack.  The stove top is tiny, so need a tiny stainless steel fry pan, and make the storage space accordingly.  I shop with a tape measure, because a 24cm pan is actually 25cm.  No room for error. Cabinet doors and back rest

Refridgeration

Image
 Our Landy national luna fridge which has served us well on many adventures was repurposed.  Completely stripped down to bare wires, pipes and motor.  The fridge box was resized and the copper pipes were carefully wrapped around the new box. Then epoxy foam reapplied using a box mold.  The heat that the foam generates did unfortunately kill the thermostat.  Waiting to get new part and then we can test it! Fridge top opening

Plumbing

Image
 Fitting the exhaust water trap and plumbing.  Most of these parts are available in Cape Town.  But so much can only be sourced from the UK or US.  Nephew Paul brought stuff from the UK as soon as travel restrictions eased.  That turned out to be a nightmare for Paul and Julie.  After a pleasant two week holiday in the Kruger Park, on the day they were to fly back to UK, SA was red listed with immediate effect.   Among all the parts Paul brought was a 5kg brass propeller.  Look forward to that being fitted. Plumbing the galley sink Exhaust water trap

Combing the cockpit

Image
The original steambox was used up insulating the steel hull, so another plan had to be made to steam bend the cockpit combing.  Again two treasured pieces of wide Iroko was steamed up for a couple of hours in a makeshift steamer of corrugated iron and sawdust.  Cockpit combing taking shape   Top edge